Monday, August 13, 2012

When life gives you lemons...

My Corner of the Thirty One World--Shop Here

No matter how hard you work, how well you prepare, or how diligently you try, life will occasionally hand you lemons.  When life gives you lemons, you can either choose to make lemonade or make life take the lemons back.  Personally, I don't care much for lemonade so I guess that leaves making life take the lemons back.  I am going to make life rue the day it thought it could give Cave Johnson me lemons!  For those that don't recognize this little rant in the making, it is from a video game that we really like, Portal 2.  This Cave Johnson guy goes on a complete rant about what to do when life gives you lemons and it ends with a discussion about burning life's house down...with lemons!  See below for the entire rant...it is definitely worth reading if not finding on youtube!

Okay, there was a point to this post and we are going to get back to it! 

So life didn't just hand me lemons last week, it dumped a metric s*** ton in my lap...or so it felt at the time.  I lost my job last week.  I have spent the last year busting my rear for this company and this is what I get...pulled into an office with a group of people on a random Thursday with no warning and told that its all over.  So what did I do?  The only thing I could think of at the time; I held my held, got in my car, and balled for about the next two hours.  When I finally stopped the water works I started thinking, and planning, and scheming, and by the end of the night I had already secured a part time job and put out at least a dozen resumes. 

Now I don't live in a place that is exactly swamped with jobs right now.  I expect it to take a while to find something in my field.  However, I do not expect to be just a grad student and housewife.  Oh no, I would never be happy not contributing to the household income...that is just how I am.  So I decided to try my hand at selling Thirty-One products.  I got myself all signed up over the weekend and now I am ready to start selling.  This is where you all come in.  At this point in my life, I literally can't afford to be proud.  So as hard as this is for me, I am asking you all to help me by either booking an online or catalog party, making a purchase, or sharing this post and link with everyone you know.  Please help us keep our heads above water.

There is a link below at the bottom of this post, and up at the top, that takes you to my little corner of the Thirty-One world.  Follow it, and go to my parties under the picture all the way to the right.  The party is Kristyn's Launch Party and will be open until 8/27/2012!  Thank you so much in advance for everything I know you are about to do for me!


Thank you for being such wonderful friends, family, and fans.

Love,

Kris
 
My Corner of the Thirty One World--Shop Here

Tuesday, July 31, 2012

Become Friends with The Button Biter on Facebook!

I have been getting a lot of questions and comments through Facebook lately and will be addressing many of them on there.  Make sure to friend The Button Biter on Facebook so you don't miss out!  Also, remember to follow the blog here to keep up to date on new posts and tutorials!

Monday, July 30, 2012

Carpet Cleaning Magic


Everyone loves a good party!  Minus the host when it comes time to clean everything up the next day...or in my case over the next month!  My birthday was back at the end of June and my friends and I decided to throw a huge party!  It was uh-mazing!  We had a killer sound and light system (thanks Matt), spiked gummy bears, glow in the dark and black light body paints, and one heck of a party juice!  At one point we were jump roping with glow stick "ropes", at another we were going crazy to Cotton Eyed Joe, and before the night was over we had been to the pool and back!  All of my new neighbors came out and celebrated with us and I found out that my floor at Maddy Manor is where it's at!  The next day was followed by our traditional post drinking cracker barrel breakfast and then I was off to finish cleaning up my home.  I have to give my guests props because no one knocked over any cups or spilled their drinks...however, they weren't so good about wiping off their cups after filling it with juice and I found little red droplets all over my living room.  I tried traditional carpet cleaner, oxy-clean, vinegar, baking soda, a steam cleaner, a shampooer...nothing got the stains out.  I had all but given up hope of ever having a clean floor again when I found this post Freckle Face Girl.  It only took the spot test for me to fall completely in love with this method of getting stubborn spots out of carpet!

What You Need:
-Ammonia
-Water
-Spray Bottle
-Iron w/ Steam Setting
-White Towels (white bar towels work great and they are cheap)

What You Do:
-Mix 1 part ammonia with 1 part water in the spray bottle
-Turn on iron and let it heat until it begins to steam

Saturate the stain in the ammonia solution

Cover the area with a white towel and iron for 20 seconds
The stain absorbs into the towel and when you lift it....
The stain is gone...the steam makes it look bleached here

Be careful not to breath in the steam when you are doing this and make sure no one walks over the area for a few minutes as the carpet gets extremely hot!


Thursday, July 26, 2012

Strawberry Sherbert

Yesterday after work and the gym I had to make a quick run to the grocery store and talk about temptation.  The worst part about starting a diet and exercise routine is the constant craving for any and everything bad for you!  Being hot and sweaty still from the gym, the frozen desert aisle was hell on earth!  I saw strawberry ice cream and that was it...you know you are in a bad aisle when you start fantasizing about ice cream and chocolate sauce!  So instead of giving in to the fattening but oh so delicious treat, I decided to try making my own frozen strawberry soft serve like the banana we did the other night.  So I grabbed a bag of frozen, sliced strawberries and got the heck out of there before I gave into my cravings!

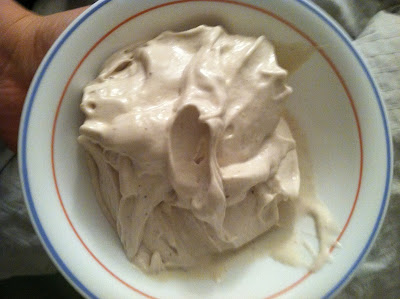
I started with just strawberries but they didn't get smooth like the banana so I added a little bit of whole milk and some leftover frozen bananas.  It creamed up nicely but the berries were a little too tart for my taste so I added some Cool Whip and that did the trick.  It's not as sweet as the banana soft serve but I liked it, the hubby liked it, and it shut the nagging voice in my head that was tempting me to go to Bruster's up for the night!  Enjoy!

Strawberry Sherbert

Ingredients:
-2 Cups of Frozen Strawberries (sliced)
-1/2 Frozen Banana (sliced)
-1/4 Cup Cool Whip (thawed)
-1/4 Cup of Whole Milk (if needed)

Recipe:
-Blend strawberries and bananas together until mixture begins to cream
-Add in cool whip and blend until desired consistency is reached.  Add milk if necessary.

The recipe makes more than enough for 2 with each serving being only 121 calories, 3 grams of fat, and 9 grams of sugar!  We will definitely be making this again!j


Tuesday, July 24, 2012

Tabletop Fire Pot

The Shenandoah Valley is a gorgeous place to live.  The only thing I'm still not really used to is the idea of hot hot summer days and chilly summer nights!  One of my closest friends is about to move to the other side of the state for a great new job and we threw him a going away cookout to send him off in style!  My friends and I love to sit around outside and talk for hours while we are slowly eaten to death by mosquitoes but the weather forecast was indicating one heck of a chilly night.  So mother necessity rang and we decided to try out making our own tabletop fire pit!  Ok...it was more of a fire pot!  Ashleigh and I had both seen multiple ideas for this online and as we couldn't find any galvanized buckets, we went for the terracotta pot.  Now, I should note that after dishing out major bucks for this killer steak dinner we were on a major budget.  Plus by the time we got around to setting the fire pot up, we were a little rushed and presentation was not a concern!

It was incredibly simple to put together and worked like a charm...for what we needed it for anyway!  All you need is:

-Terracotta Pot
-Aluminum Foil
-Self-Lighting Charcoal
-Lighter
-Stuff for S'mores (optional...but highly encouraged!)

-Line the inside of the pot with aluminum foil
-Make a ball of foil to place in the bottom of the pot--adjust the size according to how much charcoal you plan to use
-Fill the pot with charcoal and light

-Sit around and enjoy the warmth!  Wait for the coals to go down and roast up some marshmallows for S'mores!


Banana Soft Serve

Bikini season is in full gear once more and I am still far from being in one!  As a weight loss enthusiast, I am always looking for new recipes, especially for sweet treats, that won't break a diet into a million pieces with just one bite!  I have been hearing a lot about this all natural, homemade banana soft serve lately and last night I decided to give it a go.  It was AMAZING!  Even though it lacked the consistency of soft serve, the taste was to-die-for!  It is such a simple recipe and I have to share it:

Ingredients:
-two bananas

Recipe:
1.  Peel and slice your bananas
2.  Freeze them in a Tupperware container--at least overnight*
3.  Give them a good long whip in a food processor or blender
4.  Enjoy!

*I was impatient and only let mine freeze for about 4 hours so the consistency was way off...I didn't realize how long it takes bananas to freeze!

*UPDATE--after letting the bananas freeze overnight and all day the next day, my consistency was perfect!  Even the banana ice cream hating hubby loved it!

I have heard of people adding a touch of peanut butter, coco powder, strawberries, etc. to theirs or topping it with homemade chocolate sauce or jam to kick it up a notch.  Personally, I thought the flavor was incredible.  Two bananas makes a lot so I divided it into 2 servings that weighed in at about 110 calories a piece!  It was like getting a real treat without the guilt!

Sorry I've Been Tardy

To everyone that has emailed or commented on the blog asking for tips and instructions, I apologize for my tardy responses.  We moved about a month ago and to be quite honest, my house looks like a hurricane hit it followed by a tornado and in some rooms an avalanche!  It is my plan to spend Friday night and Saturday cleaning, unpacking, and organizing everything!  I can't even find half of my crafting stuff in the mess to be able to do anything!  Hopefully I will be able to get everything squared away and spend Sunday doing some of the tutorials I have promised!  Thank you so much for viewing and sticking with me here!  I can't wait to be back in action.  I have so many projects to show you and a list a mile long of things I want to do for the new apartment!

-Kris

Thursday, June 14, 2012

Ah Moving Week, You Are Finally Here!

My first thought this morning was that Jason and I are officially the tenants of our new apartment!  I got out of bed and daydreamed about getting to pick up the keys after work and give the new place a good scrub down while I was getting ready for work.  I stopped at the same place I do everyday to get my morning coffee and then it hit me...this is the last week that I will stop in every morning.  I will have a new place on my new side of town come Monday.  Then it hit me again.  This complex was my first home on my own.  It is where I learned to sink or swim, where I began my business, where we celebrated our engagement and planned our wedding, and where I broke my toe on the front steps twice.  As unhappy as we may have been for the last couple of months, there are still some really good memories.  Packing up and moving this weekend will be a bittersweet event.  Okay emotional time is over, time to start focusing on the move again!

The Ladies of 134 A

Thursday, May 31, 2012

French Dip Crescents

Jason and I both love french dip sandwiches but there isn't a single restaurant in our area that makes a good one.  He mentioned a few days ago that they sounded good and I have been craving them since then.  For dinner last night I had planned on grabbing some good french bread from the store and making up some serious french dips but wouldn't ya know there was no french bread left.  Long story made short, I was too tired to go across the street to the other grocery store and they didn't have any other kind of fresh bread so I said to heck with it, grabbed some refrigerated crescent rolls and decided to roll with it.  *note that I thought I was being creative until I saw it on Pinterest later in the evening*  So this is what the hubby came home to:


sorry about the poor photo quality...I really need to find my good camera

 
We had french dip crescents with au jus, and oven roasted sliced potatoes.  The entire meal took about an hour to prepare and cook. 

Oven Roasted Sliced Potatoes

Ingredients

-4 medium/large Idaho potatoes
-1 stick butter or margarine 
-1 envelope Lipton Onion Soup mix

Instructions

Preheat oven to 400

1.  Wash and scrub potatoes and peel if desired
2.  Slice the potatoes into thin slices and layer them in a 13 x 9" casserole dish
3.  Melt your butter/margarine and pour over the potatoes.  Use a spatula to stir the potatoes to make sure they are all buttered.
4.  Sprinkle the soup mix over the potatoes stirring them to get them all covered.
5.  Bake at 400 for 35 minutes.

French Dip Crescents

Ingredients

-1 can of refrigerated crescent rolls (8 rolls)
-8 slices of provolone cheese (cut into half circles for a total of 16 pieces)
-1/2 lb. roast beef sliced medium-thin
-1 envelope of au jus mix

Instructions

Preheat oven to 375

1.  Unroll crescent rolls so that you have eight triangles of dough.
2.  Place 1/2 slice of cheese of the wide end of the wedge of dough.  Top with a slice of roast beef folded to fit and another 1/2 slice of cheese.
3.  Roll the dough up like you would a normal crescent roll.
4.  Place rolls on a cookie sheet about 1-2" apart.  
5.  Bake at 375 for 15 minutes or until golden brown
6.  While the sandwiches are baking, prepare your au jus as directed on the package.

Wednesday, May 30, 2012

Meet Gizmo


Meet Gizmo, or Gizzy as we call him, the newest addition to our little family.  This little guy is six weeks old and loves to snuggle.  His big sister Ellie is tolerating him so far and when she thinks we aren't looking, she can be caught cleaning him and letting him use her like a jungle gym.  I forgot how completely helpless and pitiful kittens sound when they cry.  It broke my heart when I had to put him in the basket to sleep last night.  He is just too little to be in bed with us for now.   

Tuesday, May 29, 2012

MD how I love thee

I went home to MD this weekend to get some work done for the upcoming baby shower for my cousin and his wife.  While there I got a chance to reconnect with several friends from my high school years and we had a great time!  The ultimate score of the weekend was finding Olive Garden Italian Salad Dressing at Sam's Club.  We must have looked insane buying 3 2-packs--one for mom and dad, one for my hubby and I, and one to go all the way to Hawaii for Jess!  Then on the way home we run into this:

 Keep it classy Delaware!  I just couldn't help myself! Had to share that!

Baby Shower In Progress

I am so excited to announce that this fall we will be welcoming two more baby girls to our family!  Shannarah and Alex (my cousin and his wife) are expecting twins.  For those of you that follow me on Pinterest you may have noticed the board for the baby shower ideas.  We have all had a wonderful time planning this shower and this past weekend I made a trip to Maryland to help with some of the projects!  The shower is in two weeks and I can't wait to have the pictures and tutorials for all of the finished products up on here!  We went with a whimsical, country, shabby-chic look.  Alex and Shannarah are very down to earth and country and I really wanted to shower to reflect them.  It is a co-ed, open-house, picnic style Ba-By-Q!  Here is just a small preview of what we are working on!  Individual tutorials will be up after the baby shower!

Centerpieces for each table

Upclose of the Pinwheels--we made hundreds!

These little cutouts will become mobiles that will hang in the trees

A name banner for each twin!

Close-up of the pennants

Thursday, May 3, 2012

We Got the Apartment!

We are very excited to say that we got the tiny apartment I posted about a while back!  Well not quite that exact apartment but an identical one in a different building!  This one is definitely in better repair...the cabinets all hang straight and close securely, the kitchen floor is free of gashes and the best part is that it is a first floor apartment so it has a small patio instead of a balcony...the patio is about 10 sq. ft larger than the balcony so we actually have some usable space.  The only downside is the move in date...we can't move in until July 1st...sad face! 

Even though the moving date is just under two months away, I have a lot to get done before then!  Our current place is just over 1200 sq. ft and the new place is just under 900.  First things first I need to downsize!  The hubby doesn't have very much but I have wayyyy too much for this little apartment to handle.  I plan on spending the next month going room by room and collecting all the things we don't need and putting them into the yard sale stash.  Hopefully we will get a good weekend in early June that I can use to have a yard sale with some friends and co-workers.  Any money I make from it goes into the project fund for the new place! 

My first project at the new place is going to be the patio!  I can't decide if I want to go with a nautical theme with reds and blues or a more playful look with a variety of bright colors and patterns.  The hubby will get to decide I suppose!  The patio is small but it has some potential...after a good scrub down that is!  I want to find some outdoor storage benches and outfit them with some comfy cushions.  Lately I have loved the look of outdoor curtains so I definitely plan on hanging some to provide privacy and mosquito control!  The area is too small for a permanent table so I thought some re-designed TV trays would be an appropriate solution as I can store them in the outside closet when we are not using them.  There is a 3.5' wall that closes in the entire patio that will be perfect for sitting a few potted plants and citronella candles on so we can sit outside in peace!  As for lighting I haven't figured that one out yet but I feel like I am going to have to wait until we actually get in there so I can get a better feel for the space.

July feels like it is ages away but I have so much to get done before then!

Friday, April 13, 2012

Our, Hopefully, Soon-to-Be New Place

Yesterday, Jason and I went to see an apartment that we have been interested in for a while.  It is in a complex called Madison Manor and has the reputation of being cheap, quiet, and safe.  This complex in by no means a luxurious place to live.  From the outside, the apartments look like nothing special but they also do not look run down or neglected.  We saw a unit that will be available in mid-July.  It is a second floor apartment with a balcony *perk number 1, 2 bedrooms, 2 bathrooms *perk number 2, a fireplace *perk number 3 (or so I thought), and it has a washer and dryer in the unit *perk number 4.  It is about 850 sq feet which is a major decrease in size from what we are in at the moment.  On the website, you can find a floor plan for the unit so I grabbed it to help explain the downfalls on here.  Skip to the bottom for a list of plans to fix up the place!

As you can see, the entrance to the apartment brings you into the living room.  The floor plan does not show you were the fireplace is.  Instead they show a couch.  The fireplace is along the same wall as the entrance and we have a few problems with it:

1.  We can't use it
2.  It takes up a lot of space
3.  It is dirty as sin and looks horrible
4.  There is no screen or anything on the front of it and the brickwork makes it look like there is just a giant hole in a brick wall.

The balcony is awesome...no complaints there!  It is on the second floor so the third floor balcony actually problems a cover for ours.  This way we can sit outside and enjoy conversation even if it is windy or drizzling!  This is a major plus for Jason in particular.  His idea of a perfect summer day is sitting outside on a balcony or deck eating watermelon and talking politics with me!

The living room is going to be a challenge.  Our living room furniture is a bit too big for this room and while it would fit, it would make the room feel smaller and cluttered.  This is an easy fix though.  We plan on selling the over sized entertainment center, the chaise lounge, and two of these cubicle shelving units that we have. We intend on buying a smaller console for the Xbox and dvds and getting a wall mount for the TV to make the room feel more spacious and open.  We also plan on changing the color scheme, currently black with red and white accents, to something lighter like shades of light green.  Hopefully this will help balance the dark brick on the fireplace and keep it from weighing the room down like it currently does.

Our kitchen table is massive and we rarely use it so we are selling that bad-boy and replacing it with a smaller table.  I really want something that is taller like a bar top style.  There is the little dining nook off of the galley kitchen and a smaller table would open up the walking path or even allow enough room to put the desk there too instead of leaving it in the guest room.  The only thing we need to do to the dining room is swap out the over head light fixture.  The current one is a milky white glass that really dulls the amount of light coming out.  As there is no light in the living room we really want to improve this one.

The kitchen is by far the worst part of the entire unit.  The size is fine.  I would like more cabinets and counter space but we get a pantry/closet in the kitchen for storage so I can work with what I get.  Also there is a wall between the closet and the fridge that is the perfect size for a peg board to be hung to store pots, pans, lids, etc!  The problem with the kitchen is that the cabinet and drawer doors are all extremely warped, broken, and just not functional.  I am being serious when I say that 80% of the cabinets can not be closed because the doors are messed up.  The kitchen floor also needs to be replaced.  It is an old linoleum floor that is at least 6 years old and has an 8 inch gash in it.  The landlord said the whole place was getting new carpet and a paint job but that the kitchen floor and cabinets would probably not be fixed.  Well, that's the deal breaker.  If they won't fix it, we won't sign a lease.

The bathrooms are small and doing laundry will be awkward but we can manage!  Two people can definitely not be in there getting ready at the same time that's for sure!  The bedrooms are small too but our furniture will fit and we can make those work too.

So today I have been thinking non-stop about what I want to do to breathe new life into this place.  Here's what the hubby has agreed to so far:

1.  Painting the living room wall opposite of the fire place light green to draw the focus there.  We will also add some wall art and shelving to keep the focus away from the fireplace.
2.  If the landlord refuses to fix the kitchen floor, we are willing to put down some inexpensive laminate flooring to fix it up.  The cabinets remain a deal breaker.
3.  Adding a painted peg board to the kitchen for vertical storage to help free up cabinet space.
4.  Swapping out the dim light fixture in the dining area for a nicer and brighter one
5.  Hanging a mirror over the fireplace to help make it more attractive
6.  Painting accent walls in each of the bedrooms to make them less sterile.
7.  Adding a little table and chairs on the balcony for outside dining.
8.  Adding plants to the balcony for some color and decoration.
9.  Adding shelving units to the outdoor storage room to organize it and make more space for storage.

I'm sure we will come up with more to do before we move in but this is our plan to start.  I really hope the owner makes the changes that are deal-breakers so we can move forward.  I can't wait to do before and after shots of the process!

Getting Out and Moving On

The Background
June 24, 2010...I sign the dotted line on the lease for my very first apartment and my life as an independent adult begins.  At first everything is great.  My roommate and I are welcomed into the community by many of our neighbors.  We enjoy laying by the pool and soaking up the sun on our days off.  On the weekends we have some friends over and the 90 year old lady from downstairs does shots with us on my 21st birthday.  We were living the life.  Fast forward a few weeks.  At 2 am we are pulled out of bed in a panic to the sounds of banging on our door.  We collide in the hallway on the way to the door terrified that there is an emergency.  As we get to the door in the living room we hear wild giggling in the hallway.  We open the door and find two kids from downstairs laying on the floor kicking our door and finding it hilarious.  I go down to their apartment, knock on the door, and get told by their father that its 2 in the morning and I need to leave him alone.  He never gets his kids to come inside and my roommate and I spend the rest of the night awake.  Fast forward a few more weeks.  It's mid-fall and my roommates, we added a third over the summer, and I are moving from the apartment to a townhouse in the complex to escape the door banging bandits.  While attempting to move the extremely heavy sleeper sofa across the lawn we notice two girls sitting on the hood of my car.  I ask them to get off and they flip me the bird.  I tell them to get off and they climb onto the roof of the car.  I call the landlord and they run...and he does nothing.  The list of events is miles long but I will save you the boredom.  Fast forward to the present time.  My hubbling and I live in an apartment across the complex.  It is a massive apartment weighing in at a little over 1200 sq. feet.  We are in no way dying for more room here.  We love our layout and are displeased with very few things in the actual unit...we'd like a washer and dryer in there and sturdier doors for the two entrances to the apartment but that's it.  The neighborhood, however, has gone way way way downhill lately.  A kid across the complex was jumping from one hood of a car to another and went through the windshield when they miscalculated...their mom went off on the owner and the landlord supported her.  We have only one child in our building, the most beautiful two year old girl in the world, and yet there are usually about 9 kids running up and down our stairs yelling and screaming and banging on the doors.  The landlord just told me to call the cops...I don't know about you but I don't believe in wasting the time of our police on something so small.  My car took damage from being shot by an air soft gun operated by an 11 year old without any kind of adult supervising him.  My neighbors frequently leave trash in the hallways along with other large items that are easily tripped over.  My landlord tells us that we are in the wrong for asking them to remove said trash and items. 

The Plan
Needless to say, the hubbling and I have had enough and do not plan on extended our lease with this complex.  We have been looking and looking for a new place since January.  The problem with where we are is the lack of available rentals that fit our needs.  We do not want roommates or to live in a student complex with the JMU kids.  We like to be social and hang out with friends but living in a party complex simply won't work for us.  Most of the available rentals are geared toward students and are way over priced for what they are...but when Mommy and Daddy are paying the bill and you have to have a place to live to stay in school here, who cares.  Our plan was to find a cheap, little apartment, pay off some bills and start really building some savings so we can buy a home of our own here in the next few years.  Like I said, most apartments around here are wayyyy too expensive for what they are.  Our current place is a steal for its size but now we know why...who wants to pay good money to put up with that kind of drama?  So we found this little complex that we are really interested in and the next post will be all about it's downfalls, potential, and more!

Wednesday, April 11, 2012

If April Showers Bring May Flowers, What Do April Snow Storms Bring?

Right now, I am sitting at my desk looking out of one of my windows at SNOW FLURRIES.  Seriously!  I waited all winter for snow and now that I have broken out the flip-flops and packed away the snow boots here it comes again.  Personally, I am going to stay here in denial and pretend it is just ash from the not-so-far away forest fire that currently has George Washington National Park ablaze.  I have been incredibly lazy the last two weekends and have done absolutely no crafts.  If life would stop getting in the way I would probably have half of my to-make list done by now...oh well, c'est la vie.  So for now all I have is a promise that I have managed to stay on top of work, I am still doing well in school, and life has not yet managed to defeat me!  Hopefully I will find some time this weekend to have some fun in my craft corner!  However, I will have to spend some time doing a deep cleaning on the table since my wonderful cat decided to break open a bottle of Mod Podge and roll in it.  Let me tell you, that was some kind of fun trying to wash all of that out of her fur.  It took about an hour and half a bottle of kitty shampoo to get her un-gunked.  She was a trooper though!  So for now I am still stuck at work...why oh why did I volunteer for the long shift.  Since this week is spring break for me I plan on spending the weekend doing some fun projects.  I was finally able to track down some freezer paper so I plan on attempting to make freezer paper stencils and seeing how that goes! 

Monday, April 2, 2012

Nightstand Revamp


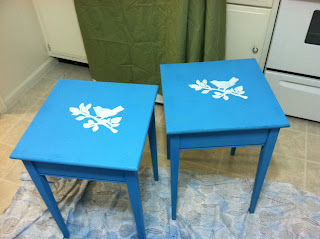
When they kicked me out on my own, okay I willingly went and there was no kicking out, my parents gave my roommate and I these old shaker tables that they had bought back when dinosaurs roamed freely.  They sat in my Harry Potter closet for a couple of months until my roommates decided to get Sugar Gliders and needed an end table to put the cage on.  So we broke these out and put them together.  When Jason and I got our first apartment together, I realized that I really wanted two matching nightstands for our room instead of the short bookshelf and one mushroom table I had been using.  With money being tight, I decided to use these instead of buying new ones.  The unfinished wood look was far from coordinating with our bedroom so I decided to give them a makeover.  A few cans of spray paint and a quick stencil later, I had two much prettier nightstands.  Too bad they are about to be re-done.  The blue wound up being too bright for the rest of the decor we picked out...and by we I mean my girlfriends and I because there was no way in heck I could actually get Jason to plan our bedroom with me! 

Here are some things that I learned the hard way with these bad boys:

1.  ALWAYS PRIME FIRST
2.  Spray paint is quick and fun but also kind of a pain sometimes...INSERT LINK
3.  Wear gloves because spray paint is a *&#@% to get off your hands
4.  Be patient...adequate dry time is not optional

Family Initial Wall Collage


I can't lie, ever since the wedding, I have been obsessed with projects involving our initials!  I have wanted to do something like this for a while, but I wasn't sure what I wanted to mount the letters on.  I found these great plaques at Michaels for about $3 each.  I sanded them, painted them, mounted my letters and added some decoupaged wooded birds to complete the look!  I can't wait for the paint to finish curing so I can mount them on my living room wall.  We are looking at moving to a new apartment complex soon and our new place would have a fire place.  I think these would look awesome over the mantle!

Organizing my Craft Corner

It has only taken three months, but I finally got around to really organizing my craft corner...ok, well now it is more like my craft half of our living room!  Previously, my corner consisted of a long table, a chair, an ironing board, and a mess of stuff piled up up the table.  This weekend I stole two of our cubical shelving units from one side of the living room and put them to work holding organized containers of supplies.  I grabbed a couple of woven baskets that I bought from Ikea when I got my first apartment and used them to store scrap fabric and newspapers for surface protection.  Once I had all of the large stuff organized and stored away, I started working on the items that were oddly shaped, easily damaged, etc. that I didn't want to throw onto shelves with everything else.  For these items, I found careful spots under my table or on my wall!  My final touches included a hanging basket on the end of the table for scraps of scrapbook paper, a cutting station on the end of the shelves to prevent burying my paper cutter under clutter, elevated wire racks for drying items, and hanging craft towels from a embroidery hoop on the wall for quick and easy access.

These cheap wire racks (kitchen org. at Wal-Mart) keep drying items out of dangers way

All of my stencils are safe from getting bent or turn when they are up on the wall.

Hey look I can actually find stuff now!

All of my scraps of paper are safely tossed in here to be used later!

Terracotta Notta Fan

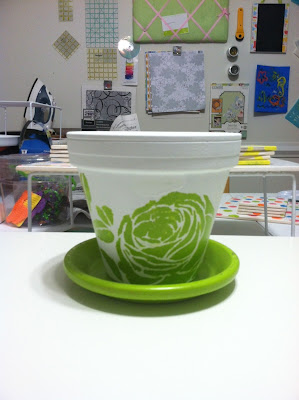
I have seen a lot of really cute flower pot photos floating around Pinterest and various blogs lately and I wanted to make one so I did....and I doubt I ever will again!  I am not a good free hand painter so I rely on stencils for the most part.  Have you ever tried to wrap a stencil around a pot and get it to stay long enough to do the painting?  If so, you know what a pain it can be.  If not, please attempt this immediately and have someone video tape it...a good laugh would be much appreciated!  I found that this craft simply wasn't worth the hassle! 


Twinkle Twinkle Little Jar


Back in March, I had to say goodbye to my sister, brother in-law, and 7 month old nephew as they jetted off to Hawaii for 3 years.  This is an amazing opportunity for my brother in-law, Josh, as it puts him working on a submarine...his dream!  As happy as I am for him, not to mention proud, it absolutely killed me to say goodbye to Jessica and Finnlee (aka Boogie).  I am the kind of person that finds something small and stupid to fixate on when I am upset or stressed out and this mega-move was no exception.  I spent some time researching Hawaii and I found out that they supposedly have no lightning bugs there.  How can you not have lightning bugs?  What do those poor kids do for fun?  I mean, it is a staple of childhood as I know it to capture helpless lightning bugs in a jar and then let them free when mom says its bedtime...unless you are my husband who, as a child, smeared dead lightning bugs on his skin so he could glow too.  So I got completely fixated on the idea of Boogie not having lightning bugs to catch and decided I had to bring them to him.  Well, the decent person buried deep down inside of me said that attempting to ship a jar full of lightning bugs to Hawaii was not only gross but also murder in the first degree.  As usual, I was on Pinterest one day--really its amazing that I still have a job--and I saw this post for glow in the dark jars.  I decided to try it out and I thought the results were awesome.  I love seeing my jars still glowing in the dark corner of my living room known as the craft corner as I am leaving for work in the wee hours of the morning.  I found some awesome neon colored glow in the dark paint online and am impatiently awaiting its arrival so that I can make my jars glow as brightly as the ones in the pictures on Pinterest.  As you can tell by my picture, a not so great camera does not do justice to the glow my jar has!  


Chalkboard Wall Decals

After work on Friday I spent an hour or two browsing my local Michaels and I found an awesomely cheap and versatile material...sheets of chalkboard paper that are ready to be stuck to your wall, fridge, canvas, you name it!  I picked up two packs, each containing three 8.5 x 11" sheets for $1.92 a piece!  As someone who has little to no drawing skills, I decided to pick up some cheap wooden shapes while I was at it to use as stencils for the project I was already seeing in my mind!


These are so easy to make and they are really affordable...especially compared to the cost of purchasing vinyl decals.  These were small because I didn't want to waste all of the paper if I didn't like the concept made into reality.  However, now that I have made them and played around with them, I am definitely going to make larger cutouts that you can draw more on!

Coasters and Trivets

Coaster are incredibly easy, quick, and fun to make.  I spent a few hours of the weekend playing with ceramic tiles, Mod Podge, acrylic paints, scrapbook paper, card stock, and stencils and here is what I came up with:


Top Row Left to Right--Decoupaged and Stenciled, Decoupaged, Decoupaged, Stenciled
Second Row Left to Right--Decoupaged, Decoupaged and Stenciled, Acrylic Paint, Painter's Tape Stripes
Bottom Row--Layered Sponge Paint

I wanted to play with doilies but surprisingly I couldn't find any while I was out on Saturday.  So I played with what I had and could easily find.  All of the coasters had multiple layers of Mod Podge done on top to seal and protect them!  I am pretty sure the guys at Home Depot thought I was smoking something when I got excited that the tiles were on sale for 9 cents a piece!  They had larger 8 x 10 tiles that I decided to make some cute trivets out of them.  The only difference in the process between doing coasters and trivets is the need to use an acrylic spray finish on the trivets.  Mod Podge is NOT heat resistant so you need to finish it off with a coat or two of acrylic.  I can only imagine the mess it would make to put a hot dish on top of Mod Podge.
My Favorite
A Close Second for Favorite


Acrylic easily peels off of ceramic...I brushed a little too hard over the blue shell

Friday, March 30, 2012

Photos of our Wedding Crafts

I have mentioned my wedding a few times and talked about some of the things we did for it.  Sadly, we never took a picture of the centerpieces or the amazing wall of stars--okay so it was actually a giant black curtain that the vendor had to rent last minute because someone had ordered demolition to be started the Wednesday before the big day and there was a giant hole in the wall!

Our centerpieces were simple hurricane globes with a red candle in the center.  Instead of using a wreath around the base of the globe, my mom actually sewed little fabric peppermint shaped wreaths.  I will have to dig one out of my closet and add a picture here later so everyone can see!  They were really cute and added a lot of color to the tables!

I do have pictures of some of the other things that we worked on.  All credit for the handmade items goes to my Momma and Aunt Kathy!

Silver Balls That Were Hung From The Wall of Stars

our flower girl and ring bearer were both under a year so they got cute decorated strollers to come down the aisle in

Its a pretty distant picture but the swag on top of the arch and the chandelier of crystal branches were all made by hand
I didn't mention them in the other post about where I got so crafty by my sister and brothers are VERY crafty too!

Reponding to Your Questions About the Coasters

I have gotten several emails asking about making the coasters so I wanted to put up a quick post addressing the common questions.

Q:  What size did you cut your paper?
A:  I was using a 4 x 4 coaster so I cut my paper to be 3.8 x 3.8.  This prevented having paper that was hanging over the edges and made it much easier to get a good bond with the coaster.

Q:  How did you get all of the air bubbles out?
A:  Well...as you can see in the picture of the finished kitchen tray I didn't right away.  However, I have found that it is easy to get air bubbles out when you use a light coating of mod podge on both the coaster and paper, work at smoothing the paper down for about a minute, and allow adequate dry time before sealing with a top coat.

Q:  How do they hold up?
A:  Its still too early to tell, but so far so good.  I put four thing coats of mod podge on top to seal them and so far condensation hasn't hurt them.  I will be sure to keep checking on them and let everyone know how they hold up or fall apart over time!

Q:  What else could I use to make coaster?
A:  There is no end to what you could do.  You could decoupage fabric, doilies, lace, ribbon, print outs of lyrics, photos...the list goes on!  Or you could paint them, stencil on them, cover them in glitter, bedazzle them...again the list goes on and on!


And even though it has NOTHING to do with the coaster, I couldn't help but share this one that I have gotten several times.

Q:  How did you get so crafty?
A:  Well you see, when a woodwork madman and a quilting genius fall really love each other...okay not really!  But I did grow up around some pretty crafty people.  My PaPa (paternal grandfather) and Daddy are both great with woodwork and building things.  My Jammie (paternal grandmother) can carve, paint, and quilt incredible pieces.  My Momma is the most amazing quilter I have ever known...everyone gets married just so they can get one of her wedding quilts!  My Aunt Kathy (Daddy's sister) is probably the most versatile crafter in the family.  She can do it all!  She made amazing decorations for the wedding--I need to do a post for them--and then turned a bride's worst nightmare into a stunning addition to the reception hall that looked like we had spent time and energy planning it on purpose!  Tammi--there is no classification under which she can be placed...she is like a mom, aunt, sister, bestie, all in one--is an epic photographer!  She did all of our wedding photos!  Matt--son of Tammi and pretty much my little brother--is an incredible artist.  I want him to do a guest feature on here one day!  So yeah, I grew up going to craft shows, quilt shows, carving festivals, you name it!  I have always dabbled in a little bit of all of their hobbies and skills--some of which I was much better at than others--and now I'm claiming my own little corner in our family's museum of crafts and arts.

Wednesday, March 28, 2012

Decoupage Trays and Coasters

There are two things I have been wanting for a while:  to try decoupaging and a tray for my makeup and brushes in the bathroom.  Tonight I decided to decoupage a tray for the bathroom and knock out two birds with one stone.  I spent about 30 minutes in Michaels after work trying to pick what paper I wanted to use and I fell in love with this kitchen appliance paper so I decided to make a little serving tray too!  As you will see in the pictures, my first attempt at decoupaging was far from perfect but I had fun and over time I am sure I will be able to refine my skill!  Enjoy!

Supplies
-Two unfinished wooden trays
-Two sheets of each print of scrapbook paper
-Mod Podge (my new favorite thing!)
-Ribbon
-Acrylic Paint
-Patience and Good Music

I found unfinished wooden trays at Michaels that were on sale for $3.99 each.  I had to sand down some of the edges and the handles to make them smooth for painting but the price was good so a little extra work is no big deal!  Once I had picked out my papers, I selected coordinating acrylic paints.  My last stop in the store was the ribbon isle to get some extra decoration.  Then I hurried home to paint and decoupage my trays!

Three coats of paint and the trays were ready to go

The bathroom tray!

The kitchen tray...I had a lot of bumps in this one but its a learning process 


I redid some holiday coasters I never cared for to make matching ones for the kitchen

Quick Cobbler

My mother-in-law saw a post for an easy mock cobbler on Pinterest a while back and has been raving about it since she tried it.  I have never attempted to make any kind of cobbler before and to be quite honest, I didn't even know that it was different from a crisp!  Last night I made a hodge podge of finger food for dinner and decided it might be nice to treat the hubby to a dessert too.  So I grabbed the ingredients, all of which I already had on hand, and threw this super easy concoction together.  The original source for the recipe pin can be found at the bottom of this post!


Recipe:

-2 cans of ready to use pie filling
-1 cup of margarine melted
-1 18.25 oz package of cake mix

Spread pie filling evenly across the bottom of an 8 x 11 pan.  Top with dry cake mix and then pour the melted butter on top.  Bake at 350 for 50 minutes or until golden brown.

I tried the recipe with apple filling and golden butter cake mix.  Before I put on the cake mix, I sprinkled a little brown sugar and drizzled some caramel sauce over the apples to give it more flavor.  This recipe definitely passed the test.  My husband, who is not a big desert eater, loved it!  I strongly suggest topping yours with a scoop of ice cream.  I can't wait to try this again with peach filling for the summer!
Homemade Mock-Cobbler

Original Posting

Monday, March 26, 2012

What is the Button Biter?

I have been asked this question a lot since I started this whole endeavor a few months ago.  The Button Biter is not a what...its a who.  And that answer is me.  I am The Button Biter and I have been since I was a wee little baby.  My grandfather, and might I say one of my biggest fans and supporters of every crazy thing I jump into, nicknamed me his little button biter when I was a baby because I used to chew on the buttons of his shirts.  When I was trying to come up with a name for my blog and Etsy shop, I couldn't come up with anything remotely crafty and creative that wasn't already used by someone else.  After thinking on it for a good while I thought of The Button Biter because, let's face it, who else would think of that?

Word Clouds

Word Clouds have been popping up every where lately.  I have seen them on Pinterest and Facebook, on advertisments, T-Shirts, even my electric bill last month...who doesn't love a word cloud telling them all the reasons why the increase in price was worth it!  Long story made short, these little projects have been on my to-do list for a long time and once I got around to it, I went word cloud crazy.  I started out with a website called Tagxedo to make my first few word clouds:

Lyrics to the hymn from my college in the shape of our mascot


Then I decided to try doing them free handed which I found to be more work but way more fun!

Portal 2 Lemon Quote--my hubby loved this one